Creating Campaigns
Learn the basics of creating a Google Ads campaign with Search Hustle.

Considering the Google Network is able to reach 90% of online consumers, you’d be remiss to not utilize pay-per-click advertising with Google Ads.
Google Ads (once known as Google AdWords) is one of the top advertising options around. That’s why the vast majority of businesses take advantage of it as a way to get their website in front of the eyes of thousands of consumers. After all, for every $1 spent on Google Ads, the average business makes back $2 in revenue.
It isn’t especially difficult to get started with Google Ads. However, the process can feel daunting if you lack any experience setting it up. Follow this step-by-step guide to help you set up a Google Ads campaign for the first time

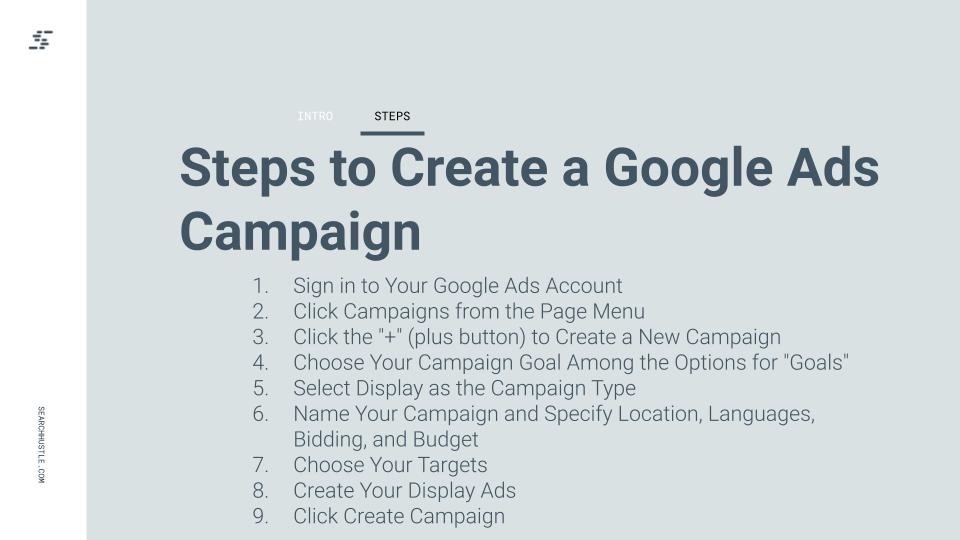
Step 1: Sign in to Your Google Ads Account
Before you can begin, you must sign in to the Google Ads account that you own.
If you don’t yet have an account, then you will need to create one. You can do this by going to ads.google.com and clicking on “Start now”. From there, you’ll be directed to a page where you sign in with a Google account. If you lack a Google account, you’ll have to make one.
After you’ve finished signing in, you’ll then come to a screen where Google wants to know what the main advertising goal is. Don’t answer this! You want to have complete control over the account. So, instead, look at the bottom of the screen where you will see a tiny (and we do mean tiny!) link that says “Switch to Expert Mode”. Click on that to get started with setting up the campaign.
Step 2: Click Campaigns from the Page Menu
If you’ve done ads in the past, you may be taken to the main account page for ads under the Google account you logged in under. From here, simply open the page menu and click on “Campaigns”.
Step 3: Click the "+" (plus button) to Create a New Campaign
Since you want to open a new campaign, the next step is to click on the “+” sign (plus button). This will allow you to create a new campaign.
Step 4: Choose Your Campaign Goal Among the Options for "Goals"
If it is your very first time creating a Google Ads campaign, once you’ve switched to Expert Mode, the process might have you skip over Step 2 and Step 3 and immediately direct you to the Campaigns page where you choose goals
Your options will include:
- Sales
- Leads
- Website traffic
- Product and brand consideration
- Brand awareness and reach
- App promotion
If you prefer, you can also create a campaign without the guidance of any of these goals. To do that, you simply click the button that says “Create a campaign without a goal’s guidance”.
We recommend that you choose to create a campaign without goal guidance. This is so that you are able to maintain complete control over the campaign without Google making any decisions for you.

Step 5: Select Display as the Campaign Type
Once you’ve clicked on the button that says “Create a campaign without a goal’s guidance”, the page will expand at the bottom. From here, Google wants to know what the campaign type will be.
The options include:
- Search – Reach customers interested in your product or service with text ads.
- Display – Run different kinds of ads across the web.
- Video – Reach and engage viewers on YouTube and across the web.
- App – Drive app promotion across Google’s networks.
- Smart – Reach your business goals with automated ads on Google and across the web.
- Shopping – Promote your products with Shopping ads.
- Local – Drive customers to a physical location.
- Discovery – Run ads on YouTube, Gmail, Discover, and more.
Since we’re dealing with creating a display ad, select “Display”.
Step 6: Name Your Campaign and Specify Location, Languages, Bidding, and Budget
Once more, the page will expand with new sections at the bottom.
First, a subsection will appear that asks you to select a campaign subtype. This selection can’t be changed later on. However, since you have chosen “Display”, there’s only one option that is auto-selected for you and that’s “Standard display campaign”.
Beneath that, you will see another subsection that is asking you to input the website of the business that the ad will be for.
Below that is another subjection titled “Campaign name”. This is simply where you type in what you want the campaign to be named.
After you do that, click on the “Next” button on the bottom right corner of the page. This will direct you to a new page.
Don’t worry if you typoed the campaign name or decided you want to change it. This page has that same field and you can make any edits if needed.
Now, let’s move on to honing in on the targeting options. This step helps ensure that your ads appear in front of the right people. For example, if you operate a brick-and-mortar business in the Tulsa, Oklahoma area and want to attract locals, then choosing the appropriate options will ensure your ad only appears to the correct people online.
First up is “Locations”. Your options for this selection are:
- All countries and territories
- United States and Canada
- United States
- Enter another location
Below that is an expandable link that says “Location options”. If you click on that, you will see two more in-depth options to choose from: Target and Exclude.
Beneath “Target” is:
- Presence or interest – People in, regularly in, or who’ve shown interest in your targeted locations (recommended)
- Presence – People in or regularly in your targeted locations.
Under “Exclude” is:
- Presence – People in your excluded locations (recommended)
- Presence or interest – People in, regularly in, or who’ve shown interest in your excluded locations
The next section is “Languages”. If you’re operating in the United States, you will most likely choose “English”.
After that is the “Bidding” section. You will see the question “What do you want to focus on?” and a drop-down menu below it. It will auto-select the recommended selection “High Quality Traffic”. However, you can switch to “Viewable impressions” if you so choose. However, we recommend staying with “High Quality Traffic”.
The next question below that field is “How do you want to get high quality traffic?” The two options for this question are “Automatically maximize traffic” and “Manually set bids”.
If you go with “Automatically maximize traffic”, then the campaign will use the maximize conversions bid strategy to try to get as much traffic as possible for the budget. However, if you decide to go with “Manually set bids”, then the campaign will use the enhanced CPC bid strategy to try to get as much high-quality traffic as possible by adjusting the bid.
Once you’ve decided on bidding, the last is “Budget”. Input what your business can afford for its average daily budget for the campaign. There is also an expandable link directly beneath “Budget” where you can go more in-depth on certain settings like ad rotation, ad schedule, start and end dates, devices, etc.
Step 7: Choose Your Targets
After you’ve completed filling out the prior subsections, scroll down to the “Targeting” section on the same page. You should see a small gear with “Add Targeting” written beside it. Click on that and several options will expand below.
The options are:
- Audience Segments – Suggest who should see your ads
- Demographics – Suggest people based on age, gender, parental status, or household income
- Keywords – Suggest terms related to your products or services to target relevant websites
- Topics – Suggest webpages, apps, and videos about a certain topic
- Placements – Suggest websites, videos, or apps where you’d like to show your ads
Fill these sections out with your unique needs for your business and then proceed on to the next category.
Step 8: Create Your Display Ads
Last, scroll down and you’ll see a section titled “Ads”. This is where you will complete the process to create a campaign.
Here you’ll find sections to upload images, logos, and videos for your display ad. There are also fields for up to 5 headlines, a long headline, up to 5 descriptions, the business name, and then additional format options and ad URL options. To the right you will also see a visual representation of all the details you enter as a preview of the display ad.
Consumers are more likely to click on an ad that contains the keywords they were using in Google’s search bar. So, keeping that in mind, be sure to do the appropriate keyword research beforehand and then include these phrases in both the headlines and descriptions. Don’t forget to end the descriptions with a strong call-to-action.
In the field that asks for an URL, we recommend sending consumers to a designated landing page that was created to match the ad. If the information on the landing page matches the ad, you will have a higher conversion rate.
Once you are happy with how the ad looks, click on the “Create Ad” button at the bottom left.
Step 9: Click Create Campaign
Finally, if you are confident that all fields are filled out correctly, click on “Create Campaign” at the very bottom left of the page. Congrats, your display ad campaign is now live!
While your ad runs, be sure to track the analytics. The upside to pay-per-click advertising is that you can see what is working and what isn’t working in real-time. Once you know which ads perform the best, you can proceed to create similar ones and even aim for higher cost-per-click keywords.

Ready to Take Your Search Hustle Further?


